Are you searching for a step-by-step guide to create a virtual machine in a VMware workstation? If yes, scroll down and continue reading this blog. By the time you reach the end of this write-up, you will have a clear idea about creating a virtual machine.
But before jumping to the steps directly, firstly, let’s have a look at some important details of virtual machines. We hope you will find this article beneficial and informative.
What Is A Virtual Machine?
A virtual machine is just as similar as a physical computer, which allows you to run operating systems and applications. These machines work by utilizing the physical resources of the physical machine, which is known as – Host system. Virtual machines are equipped with physical devices that breed on the exact viability like physical hardware. Moreover, these machines are easy to operate & manage and are easily portable.
Virtual machines generally work like a physical computer, which means if you want to install any program or an operating system in this machine, you have to perform the same functions like you did to install an operating system in a physical computer. Keep in mind to have a DVD, CD-ROM, or ISO image, which comprises installation files from an operating system seller.
Important Requirements for Creating A Virtual Machine
Some of the prerequisites which you should bear in mind before creating a virtual machine in a VMware workstation.
- Carefully read the essential details that are required for creating a new virtual machine. You can check these details on the official website of the VMware workstation.
- Validate whether the windows support the guest operating system you are planning to install or not. You can learn about guest operating system details on the VMware compatibility manual.
- If you are setting up the guest operating system from an installer disc, install the installer disc in the host system’s CD-ROM drive.
- If you’re establishing the guest operating system from an ISO image file, check initially whether the ISO image file in a directory is reachable to the host system or not.
Step by Step Guide to Create a New Virtual Machine
Follow the steps mentioned below to create a virtual machine in a VMware workstation.
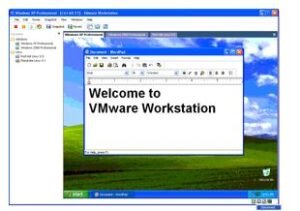
- Launch VMware Workstation: – The first step is to launch the VMware software. If you’re working in a windows hosts mode, then Double-click the VMware Workstation icon on your PC or use may even use the Startmenu (Start > Programs > VMware > VMware Workstation). For Linus hosts, type the “VMware &” command in a terminal window.

- Enter the Serial Number: – After launching the VMware workstation, the next step is to enter the serial number you have got along with your package, and then click “OK.” Once you enter the serial number, it will automatically save it in the VMware workstation and won’t ask again. If you use these commands, you will directly enter the VMware webpage and find support for your product.
(Help > VMware software on the Web > Register Now! and Help > VMware on the Web > Request Support.)
- Rename Virtual Disk Files If Necessary: – If you want to make changes or rename existing files in the Linux hosts, you can use the .vmdk extension and then press “OK.” Keep in mind, you will only get a single chance to rename the files, but if you press “cancel” mistakenly, you won’t be able to update or rename files.
If you’re working in windows hosts, you can rename virtual disk files at the time of installation. You can also use a converter for altering the .std extension file to the .vmss file. Nevertheless, it is highly recommended to turn off all the virtual machines during installation or upgrading VMware workstation.
- Create a New Virtual Machine: – After launching VMware workstation, you can open an existing virtual machine or a new one by selecting File > New > New Virtual Machine. You will find a series of screens that you can navigate using the PREV and Next buttons placed at the bottom of each screen. Read the instructions carefully, and click “Next” to step forward.
- Select Method: – Now, choose the method you want to configure for your virtual machine. If you click on the “Typical mode,” the wizard indicates you to specify or accept defaults for the guest operating system.
Choose A Guest Operating System: – Now it’s time to install the operating system in the virtual machine you planned. The new virtual machine wizard uses the guest operating system to choose the right default values and the required amount of memory. If the O.S you want to install is not mentioned in the list, press “Other.” You can have a clear idea of installing a Guest operating system by reading the online VMware Guest Operating system installation guide. Also, you can check on their official website.
Name a folder for the Virtual machine: – Now, create a new folder, and select a name for the virtual machine. This name will be used in the VMware workstation favorites list. This name will also indicate the name of a folder where all the relevant files such as disk file, boot file, and configuration file of a virtual machine are stored.
Windows hosts: On Windows 2000, Windows XP, and Windows Server 2003, the default folder for this Windows XP Professional virtual machine is C:\Documents and Settings\<username>\My Documents\My Virtual Machines\Windows XP Professional. On Windows NT, the default folder is C:\WINNT\Profiles\<username>\Personal\My Virtual Machines\Windows XP Professional.
Linux hosts: The default location for this Windows XP Professional virtual machine is <homedir>/VMware/winXPPro, where <homedir> is the user’s home directory is currently logged on.
For the effective running of a virtual machine, ensure to save its folder on a local drive; otherwise, the machine’s performance will be slower. For further details about saving files on the virtual machines.
- Align the Network Capabilities: – After creating a folder, configure the virtual machine’s networking capabilities. If your host computer is on a network and has a separate IP address for your virtual machine, select Use bridged networking. If you do not have a separate IP address for your virtual machine, but you desire to connect to the Internet, select Use network address translation (NAT).
If you have a wireless network adapter on a Linux host, NAT is beneficial. Also, NAT allows you to exchange files between the host operating system and the virtual machine.
Want to know more about virtual machine networking options in detail? or you can check the details mentioned on the official website of VMware.
- Choose Configuration Path: – If you choose Typical as your configuration path, click Finish, and the wizard sets up the files needed for your virtual machine. Also, if you select Custom as your configuration path, continue with the steps for configuring a disk for your virtual machine.
- Choose the Virtual Disks: – After selecting a path, now you’re required to select the disk you want to use with the virtual machine. Create a new virtual disk file.
Then, specify the virtual disk’s capacity, which means enter the size of the virtual disk you want to create. If you select allocate all disk space now, all the junk and cache files will be deleted, and the virtual disk performance further increases.
By default, the size of the virtual disk is 4 GB. You can divide it into two sets of 2 GB or make a large file of 4 GB.
You have access to set the in-between 2 GB to 256 GB for a SCSI virtual disk and 128 GB for an IDE virtual disk.
If you keep the virtual disk size quite small initially, you won’t be able to change its capacity later. Therefore, make the virtual disk large enough so that it can save the guest operating system and other relevant software.
Why Choose Virtual Disks for Virtual Machines?
Virtual disks are the best and reliable choice for your physical machines because they are easy to manage & work on. Besides, they can easily set up and move to a new destination or a different host computer without any hassle. Consequently, virtual disks begin as small files on the host computer’s hard drive and then expand to the size you desire.
- Select an Appropriate Location: – Now it’s time to specify the virtual disk’s files’ location.
If a SCSI virtual disk is created by default and you want to use a virtual IDE disk instead, or if you want to specify which device node should be used by your SCSI or IDE virtual disk, click Advanced.
- Your Virtual Machine Is ready to Operate: -Follow the steps carefully, and press Finish. Now, you are all set to create virtual machines in a VMware workstation.